Meeting a property damage claim lawyer for the first time can feel overwhelming, especially if you’re dealing with significant loss or damage. Knowing what to bring to a lawyer consultation can help you maximize your time and ensure that the lawyer has all the necessary information to assist with your case effectively.

Why Preparation is Key

Being well-prepared for your initial consultation not only streamlines the process but also helps the lawyer assess your case thoroughly. When it comes to property damage claims, presenting accurate details and documentation is critical to building a strong case.

What to Bring to a Lawyer Consultation

When preparing for your first meeting, ensure you have the following essential items:

1. Documentation of Property Damage

  • Photographs and videos of the damaged property.
  • An inventory of damaged items, including their approximate value.
  • Any receipts or appraisals related to the damaged property.

2. Your Insurance Policy

  • A full copy of your homeowner’s or property insurance policy.
  • Include any recent updates or endorsements to the policy.
  • Highlight relevant clauses, such as coverage limits and exclusions.

3. Correspondence with the Insurance Company

  • Copies of all communications, including emails, letters, and phone call logs.
  • Details of any offers or settlements proposed by the insurance company.

4. Repair Estimates

  • Quotes or invoices from contractors or service providers for repair work.
  • Any initial assessments conducted by your insurance adjuster.

5. Legal Documents

  • Copies of any legal notices or documents received regarding the damage.
  • If applicable, previous claims or lawsuits involving the property.

6. List of Questions

  • Prepare a list of questions for the lawyer, such as:
    • What is the typical timeline for resolving a claim like mine?
    • Are there any additional documents I need to provide?

What to Expect During the Consultation

1. Case Assessment

The lawyer will review your documents to understand the extent of your claim. They’ll evaluate:

  • The type of property damage.
  • Whether the insurance company is acting in bad faith.

2. Discussion of Legal Options

They’ll explain your legal options, including whether to negotiate further with the insurer or file a lawsuit.

3. Next Steps

The lawyer will outline the next steps, such as gathering additional evidence or starting the legal process.

Common Mistakes to Avoid

1. Bringing Incomplete Documentation

Lack of evidence can delay your case or weaken your claim. Ensure all documents are well-organized and complete.

2. Not Asking Questions

Take advantage of the consultation to clarify your doubts. Understanding the process will help you feel more confident moving forward.

3. Delaying Action

Property damage claims have strict timelines. Consult a lawyer as soon as possible to avoid missing deadlines.

The Role of a Property Claims Adjuster

Before meeting with a lawyer, consider consulting a property claims adjuster. They can help evaluate the extent of your damage and ensure you’ve filed your claim correctly. Adjusters work to maximize your insurance payout, providing valuable support before legal action is required.

Learn more about the role of adjusters here:

Conclusion: Be Prepared for Success

Your first meeting with a property damage claim lawyer is an important step in resolving your claim. Knowing what to bring to a lawyer consultation ensures that the process runs smoothly and your lawyer has the tools needed to advocate for your rights effectively.

Gather all the necessary documents, ask thoughtful questions, and act promptly to protect your property and interests. For additional support, connect with professionals like property claims adjusters to strengthen your claim before your legal consultation.

Take the first step toward a successful claim resolution today!

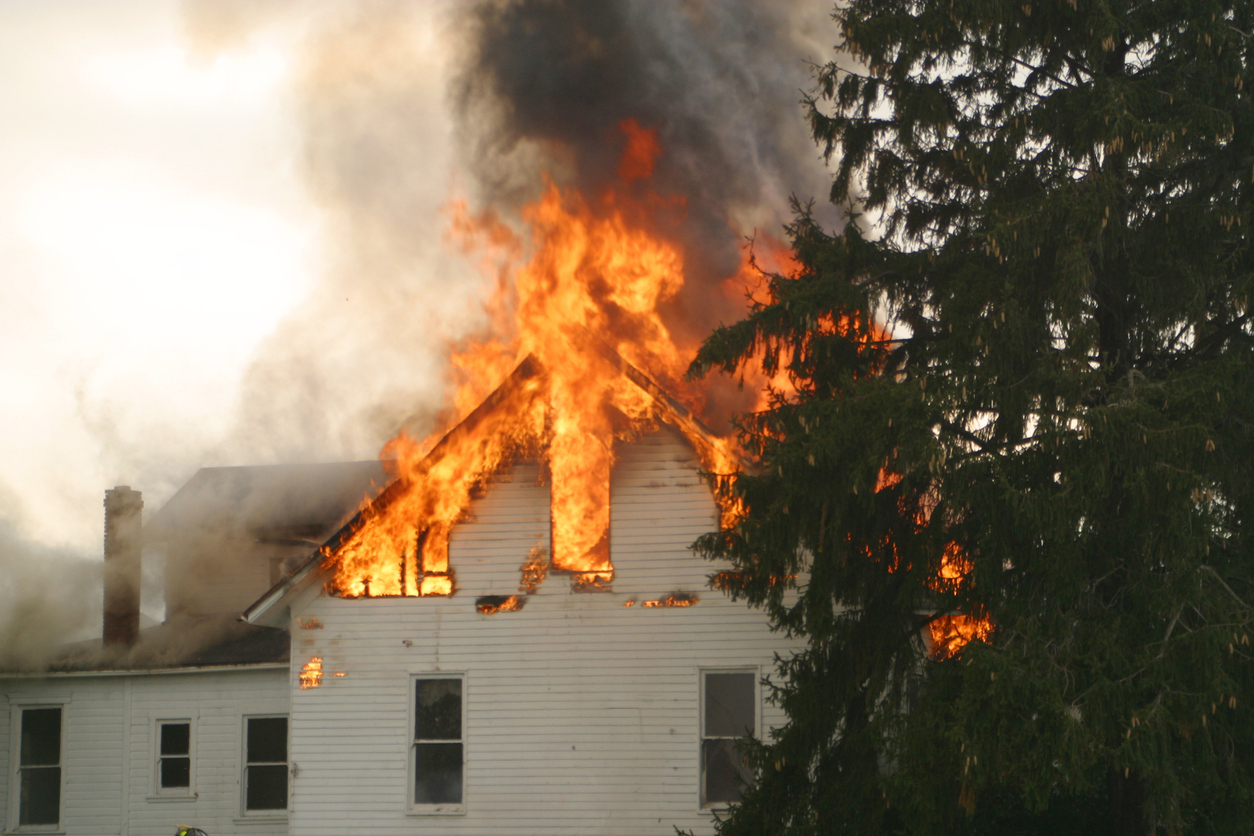
Dealing with the aftermath of a fire can be overwhelming, but understanding the fire insurance claim process can make a significant difference in your recovery. Whether it’s a house fire or a car fire, knowing how to navigate the claims process ensures you receive the compensation needed for restoration. Acting quickly and taking the right steps is crucial to protect your property and financial interests.

Understanding the Fire Insurance Claim Process

The fire insurance claim process involves several steps that ensure your losses are documented and compensated accurately. While it may vary depending on the nature of the fire, the process generally includes these key stages:

1. Notify Your Insurance Company

  • Contact your insurer immediately after a fire occurs.
  • Provide them with a basic overview of the incident, including the date, time, and extent of damage.

2. Document the Damage

  • Take photographs and videos of the affected areas.
  • Create an inventory of damaged or lost items with their approximate value.

3. File Your Claim

  • Submit a claim with all required documentation, including the fire department report and any estimates for repairs.

4. Work with an Adjuster

  • An adjuster will assess the damage and determine the payout amount based on your policy.
  • Consider hiring a public adjuster if you believe the insurance company’s offer is insufficient.

5. Receive Compensation

  • Once the claim is approved, you’ll receive a payout to begin the restoration process.

For additional help, explore Fire Damage Restoration services for expert assistance in managing the restoration.

House Fire Insurance Claim Process

When your home is damaged by fire, the process for filing a claim can be extensive. Here’s what homeowners need to keep in mind:

Steps to File a House Fire Insurance Claim

  1. Secure the Property: Prevent further damage by boarding up windows and covering exposed areas.
  2. Contact Your Insurer: Notify them immediately to start the claim process.
  3. Hire Professionals: Work with fire damage restoration experts to assess and repair the property.
  4. Provide Evidence: Submit photos, receipts, and an inventory of damaged items to support your claim.

Car Fire Insurance Claim Process

If your vehicle is damaged or destroyed by fire, the car fire insurance claim process will depend on your policy’s coverage. Comprehensive insurance typically covers fire damage.

Steps to File a Car Fire Insurance Claim

  1. Contact Your Insurer: Provide details of the fire, including how and where it occurred.
  2. Provide Documentation: Include photos of the vehicle and the fire report.
  3. Arrange for Inspection: An adjuster will inspect the vehicle to assess the damage.
  4. Claim Settlement: Based on the inspection, you’ll receive compensation for repairs or replacement.

Common Challenges in Fire Insurance Claims

1. Disputes Over Coverage

  • Insurance policies can have exclusions or limitations for certain types of fire damage.
  • Consult an Insurance Claims Adjuster Near Me to ensure all damages are accounted for.

2. Delayed Settlements

  • Insurers may delay processing claims due to insufficient documentation.
  • Keep detailed records and follow up regularly.

3. Underpaid Claims

  • If you believe your claim is undervalued, consider hiring a public adjuster or legal professional.

Tips for a Smooth Fire Insurance Claim Process

  1. Understand Your Policy: Familiarize yourself with your coverage limits and exclusions.
  2. Document Everything: Maintain detailed records of the damage, expenses, and communication with your insurer.
  3. Hire Professionals: Fire damage restoration experts and public adjusters can help you maximize your claim.
  4. Act Quickly: Delays in filing a claim or mitigating damage can affect your payout.

Conclusion: Protect Your Property and Maximize Your Claim

The fire insurance claim process may seem daunting, but understanding the steps and acting promptly can make all the difference. Whether it’s a house fire insurance claim process or a car fire insurance claim process, following the right procedures ensures you recover efficiently.

For more guidance, explore these resources:

Take control of your recovery today and ensure your property is restored to its original condition!

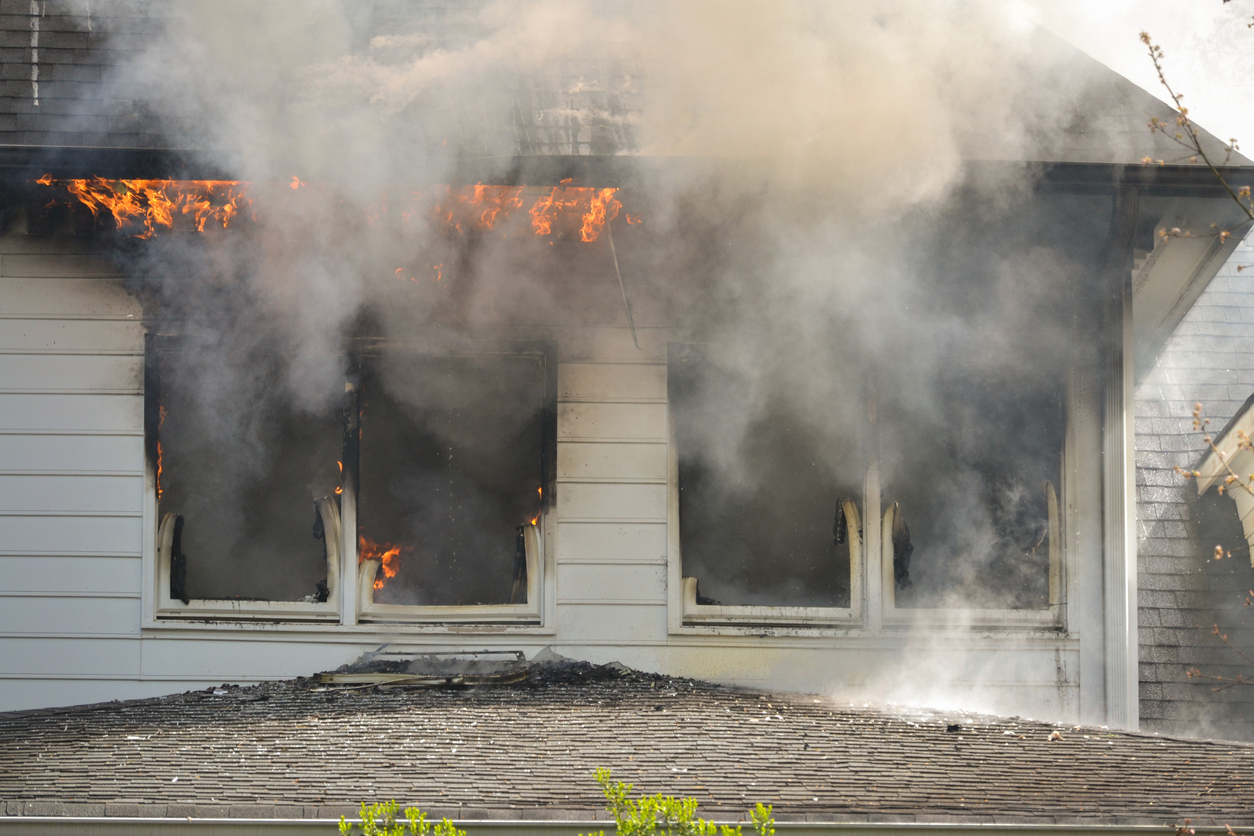
Experiencing a fire can be devastating, leaving homeowners and business owners overwhelmed by damage and loss. In such cases, seeking the help of a fire damage claim lawyer becomes crucial to ensure you receive the compensation you deserve. Acting quickly not only helps secure your property but also protects your legal and financial interests.

Why Acting Fast After a Fire Matters

Taking immediate steps after a fire can significantly impact the outcome of your insurance claim and the restoration process. Whether you’re a homeowner or a business owner, here’s why quick action is vital:

1. Prevent Further Damage

  • Fires often leave structural damage that can worsen with time.
  • Water used to extinguish fires can lead to mold growth and additional destruction.

2. Strengthen Your Claim

  • Documenting the damage immediately provides stronger evidence for your claim.
  • Delays can lead to disputes over the extent of damage or the cause of loss.

3. Speed Up the Recovery Process

  • Early involvement of professionals like restoration experts and fire damage claim lawyers accelerates repairs and settlements.
  • Quick action minimizes disruptions, especially for businesses.

Steps to Take After a Fire

Follow these steps to ensure your property and claims process are handled effectively:

1. Ensure Safety First

  • Avoid entering the property until it’s deemed safe by authorities.
  • Secure the area to prevent unauthorized access.

2. Contact Your Insurance Company

  • Notify your insurer about the fire as soon as possible.
  • Provide initial details about the damage and losses.

3. Document the Damage

  • Take photos and videos of the affected areas.
  • List damaged items, including their approximate value.

4. Seek Professional Help

  • Hire a fire damage restoration team to assess and repair the property.
  • Consult a fire damage claim lawyer to guide you through the legal and claims process.

5. Mitigate Further Damage

  • Board up windows and cover exposed areas to prevent weather-related issues.
  • Remove salvageable items to reduce losses.

How a Fire Damage Claim Lawyer Can Help

Dealing with insurance companies after a fire can be daunting. A fire damage claim lawyer provides the expertise needed to navigate this complex process.

Key Benefits of Hiring a Lawyer:

  • Expert Negotiation: They handle communication with your insurer to secure a fair settlement.
  • Policy Understanding: Lawyers interpret your policy to ensure all covered losses are claimed.
  • Dispute Resolution: If your claim is denied or underpaid, they advocate on your behalf.

For additional assistance, explore resources like Fire Damage Restoration to understand the restoration process.

Special Considerations for Businesses

Businesses face unique challenges when dealing with fires. From operational disruptions to inventory loss, hiring professionals familiar with business fire damage claims is crucial.

How to Protect Your Business:

  • Maintain up-to-date insurance policies tailored to your industry.
  • Work with a fire damage claim lawyer experienced in commercial claims.
  • Document operational downtime to include in your claim.

Conclusion: Protect Your Property and Rights

A fire can cause significant emotional, financial, and structural damage. Acting quickly and involving professionals, such as a fire damage claim lawyer, ensures your recovery process is as smooth as possible. Don’t delay in seeking help—time is critical for protecting your rights and property.

For more information, check out these resources:

Take control of your recovery process and maximize your claim with the right guidance. Don’t wait—act now!

When dealing with the complexities of an insurance claim, hiring the right public adjuster services in Orlando can make all the difference. Public adjusters work as your advocate, ensuring you receive the compensation you deserve. But how do you choose the right one? Let’s explore the key factors to consider when hiring a public adjuster in Orlando.

What Does a Public Adjuster Do?

A public adjuster is a licensed professional who works on behalf of policyholders, helping them navigate the claims process. Whether you’re dealing with storm damage, fire loss, or water damage, a public adjuster ensures that your claim is filed accurately and negotiated fairly with the insurance company.

Key Services Provided by Public Adjusters:

  • Assessing property damage thoroughly.
  • Preparing and filing detailed insurance claims.
  • Negotiating settlements with insurance companies.
  • Maximizing your payout based on the policy coverage.

Why Choose Public Adjuster Services in Orlando?

Orlando residents face unique challenges, such as hurricane-related damage and water intrusion issues. By hiring a local public adjuster in Orlando, you gain access to someone familiar with the area’s specific risks and insurance practices.

Benefits of Hiring a Public Adjuster in Orlando:

  1. Expert Knowledge: They understand Florida insurance regulations and policies.
  2. Time Savings: Managing a claim can be time-consuming; adjusters handle it for you.
  3. Higher Settlements: Public adjusters often secure higher payouts than policyholders negotiating alone.
  4. Stress-Free Process: They handle all communications with the insurer.

How to Choose the Best Public Adjuster in Orlando

Here are the steps to ensure you’re hiring the right professional for your needs:

1. Verify Licensing

Florida requires all public adjusters to be licensed. Check their license status with the Florida Department of Financial Services to ensure they meet the requirements.

2. Look for Local Expertise

Working with a local adjuster familiar with Orlando’s weather patterns and property risks is invaluable. Their experience with regional claims gives them an edge.

3. Check Reviews and References

Search online reviews and ask for client references. A reputable adjuster will have positive feedback and a proven track record of success.

4. Discuss Fees Upfront

Public adjuster fees in Florida are regulated, typically ranging from 10% to 20% of the claim amount. Be clear on their fee structure before signing a contract.

5. Evaluate Communication Skills

Choose an adjuster who is responsive and communicates clearly. You need someone who will keep you informed every step of the way.

When Should You Hire a Public Adjuster?

Timing is critical. Consider hiring a public adjuster:

  • Immediately after a disaster, to assess damages accurately.
  • If your insurance claim has been underpaid or denied.
  • When the claims process becomes overwhelming.

Conclusion: Advocate for Your Rights with the Right Public Adjuster

Hiring the right public adjuster services in Orlando ensures that your insurance claim is handled professionally and fairly. From securing higher settlements to reducing your stress, a public adjuster is your ally during challenging times.

If you’re ready to take the next step, explore these resources:

Take control of your insurance claim today and ensure you get the compensation you deserve!

Hurricanes are a harsh reality for homeowners in Florida, and Hurricane Helene 2024 is no exception. The storm has left many homes damaged, and as the recovery process begins, navigating the insurance claim process is one of the most important tasks for homeowners. Ensuring that your home is properly repaired and covered by your insurance policy can be a stressful and complex process. This guide provides essential tips to help you recover smoothly from Hurricane Helene and manage your insurance claims effectively.

Assessing Damage After Hurricane Helene

After Hurricane Florida events like Helene, the first step for homeowners is to assess the damage. This assessment will form the foundation for your insurance claim, so it’s essential to be thorough.

Key Areas to Inspect

  • Roof and Gutters: Look for missing or damaged shingles, debris on the roof, and clogged gutters.
  • Windows and Doors: Check for cracks, broken glass, and any warping that may have occurred due to strong winds or flying debris.
  • Interior Water Damage: Examine ceilings, walls, and floors for signs of water intrusion, including discoloration, bubbling paint, or soft drywall.
  • Foundation and Landscaping: Inspect your home’s foundation for any cracks or shifts, and take note of any damage to trees or landscaping that could cause further issues.

Documenting this damage thoroughly with photographs and notes will be essential when filing your claim.

Step-by-Step Guide to Filing a Hurricane Insurance Claim

Filing a claim after Hurricane Helene 2024 requires careful planning and attention to detail. Following these steps can ensure that your claim is processed quickly and accurately.

1. Contact Your Insurance Company

Once you’ve assessed the damage, the first thing you should do is contact your insurance provider. Most insurance companies have dedicated hotlines for storm-related claims. Be prepared to provide:

  • Your policy number
  • A detailed description of the damage
  • Any emergency repairs you’ve already completed

Your insurance company will likely assign a property claims adjuster to inspect the damage and determine the cost of repairs.

Property Claims Adjuster services can help ensure that the damage to your home is properly evaluated and compensated.

2. Document Everything

The more evidence you have, the stronger your claim will be. Take photographs and videos of all the damage, both inside and outside your home. Be sure to document:

  • Broken windows
  • Roof damage
  • Water stains and leaks
  • Debris in and around your property

These images will be crucial for proving the extent of your losses to your insurance company.

3. Mitigate Further Damage

Most homeowners insurance policies require you to take reasonable steps to prevent further damage to your home after a storm. This could include:

  • Tarping a leaky roof: Prevent more water from entering your home.
  • Boarding up broken windows: Secure your home from additional damage or theft.
  • Drying out wet areas: Use fans or dehumidifiers to prevent mold growth.

Keep all receipts for any materials or services you use, as your insurance company may reimburse these expenses.

4. Work with the Adjuster

Your insurance company will send an adjuster to inspect the damage and determine the payout for your claim. To ensure a fair settlement:

  • Be present during the inspection: Walk through the property with the adjuster to point out all areas of damage.
  • Share your documentation: Provide the adjuster with your photos, videos, and notes.
  • Ask questions: Make sure you understand how the adjuster is calculating the costs and whether any exclusions apply.

In some cases, it may be beneficial to hire a public adjuster to represent your interests. Public adjusters work on behalf of the homeowner to negotiate a higher payout, ensuring that you receive fair compensation for all the damage to your property.

Public Adjuster Orlando services can assist homeowners in maximizing their insurance settlements.

Common Challenges in Hurricane Insurance Claims

Navigating the insurance claim process after a hurricane can be complicated, and many homeowners face common challenges. Here are a few issues you might encounter and how to handle them.

1. Delayed Claim Processing

After a major hurricane like Hurricane Helene, insurance companies often deal with a surge in claims, which can lead to processing delays.

Solution: Stay in regular contact with your insurance company to track the status of your claim. Document all communications, including phone calls and emails, so you can follow up as needed.

2. Disputes Over Damage Assessment

Insurance adjusters may sometimes undervalue the extent of the damage, especially with roof and water-related issues.

Solution: If you disagree with the adjuster’s assessment, provide additional documentation and contractor estimates that support your claim. If necessary, hire a public adjuster to advocate for a fair settlement.

3. Exclusions in Your Policy

Some types of hurricane damage, such as flood-related damage, may not be covered under standard homeowners insurance policies.

Solution: Review your policy carefully and ask your insurer for clarification. If flood damage is not covered, you may need to file a separate claim with the National Flood Insurance Program (NFIP).

How to Maximize Your Insurance Claim Payout

To ensure you receive the full compensation you deserve after Hurricane Helene, it’s important to be proactive during the claims process. Here are a few strategies for maximizing your payout:

1. Get Multiple Repair Estimates

Before agreeing to a settlement with your insurance company, obtain estimates from several contractors to ensure the proposed payout is sufficient to cover the full cost of repairs. If the insurance company’s offer is too low, use the estimates to negotiate a higher amount.

2. Don’t Settle Too Quickly

Insurance companies may offer a quick settlement, but this initial amount may not fully cover the extent of your repairs. Take your time to assess all the damage before agreeing to a settlement.

3. Consider Hiring a Public Adjuster

If you’re struggling to navigate the claims process or feel your insurance company is not offering a fair settlement, a public adjuster can be a valuable asset. They will work on your behalf to negotiate the best possible payout.

Learn more about how to handle homeowners insurance claims at Homeowners Insurance Claims.

Avoiding Common Pitfalls in the Claims Process

To ensure a smooth insurance process, avoid these common mistakes:

  • Not filing your claim quickly enough: After a hurricane, time is of the essence. Delaying your claim could lead to further complications or even denial.
  • Ignoring minor damage: Even small cracks or leaks can lead to bigger problems if not addressed. Make sure to document and report all damage, no matter how insignificant it may seem.
  • Failing to understand your policy: Review your homeowners insurance policy carefully to understand what is covered and what is excluded.

Preparing for Future Hurricanes

While recovering from Hurricane Helene 2024, it’s important to consider how you can better protect your home against future storms. Here are a few proactive steps you can take to minimize damage from future hurricanes:

1. Upgrade Your Roof

A strong, well-maintained roof is your home’s first line of defense against hurricanes. Consider investing in hurricane-resistant roofing materials, such as metal or impact-resistant shingles.

2. Install Storm Shutters

Storm shutters protect your windows from flying debris during high winds. This can significantly reduce the risk of interior water damage and glass breakage.

3. Secure Outdoor Items

Loose outdoor furniture, garden tools, and other objects can become dangerous projectiles during a hurricane. Secure or store these items before a storm hits to reduce the risk of damage to your home.

Conclusion: Be Proactive for a Smooth Recovery

Recovering from Hurricane Helene can be a challenging process, but by taking the right steps and working closely with your insurance company, you can ensure a smooth and successful recovery. From documenting damage and filing your claim to negotiating the best possible settlement, being informed and proactive is the key to navigating the post-hurricane insurance process.

If you need help managing your claim or want to ensure you receive the maximum payout, consider working with a public adjuster who can advocate on your behalf. Visit Public Adjuster Orlando for more information on how to get professional assistance with your insurance claim.

By following these tips, you can not only recover more effectively from Hurricane Florida disasters but also be better prepared for future storms.

When it comes to maintaining your home, few areas are as important as your roof. One often overlooked component is the roof decking, the layer of material that lies between the roof structure and the shingles. The decking plays a crucial role in supporting the roof and protecting the rest of the home from water damage and other structural issues. However, replacing roof decking can be expensive, and many homeowners are left wondering whether their insurance will cover the costs. The good news is that with the right approach, you can increase your chances of getting your insurance company to pay for roof decking replacement.

In this guide, we’ll explore strategies for getting your roof decking covered by insurance, explain what factors affect roof decking replacement cost, and provide actionable insights on navigating the insurance claims process.

What Is Roof Decking and Why Is It Important?

Before diving into how to get insurance to pay for roof decking, it’s essential to understand what roof decking is and why it matters.

The Function of Roof Decking

Roof decking (also called sheathing) is the structural layer between your roof’s framework and the outer roofing material, typically made of plywood or OSB (oriented strand board). It supports the weight of roofing materials like shingles and provides a base for water barriers and insulation. Without solid decking, your roof may sag, develop leaks, or even collapse under the weight of heavy weather conditions.

Does Insurance Cover Roof Decking?

Whether or not your insurance covers roof decking replacement depends on several factors, including the cause of the damage and the specifics of your homeowners insurance policy. In general, standard homeowners insurance policies cover roof damage caused by sudden and accidental events, such as:

  • Severe weather (e.g., windstorms, hail, hurricanes)
  • Fallen trees or debris
  • Fire or lightning

However, damage caused by wear and tear, poor maintenance, or gradual deterioration is typically not covered.

Key Considerations:

  • Covered Perils: If your roof decking is damaged due to a covered peril (e.g., a storm or fallen tree), there’s a higher likelihood that your insurance will pay for the decking.
  • Roof Age: Some insurance companies have specific age limits on roof coverage. If your roof is too old, they may not cover decking repairs.
  • Policy Exclusions: Always check your policy for exclusions. Some policies may not cover certain types of roofing materials or specific damage.

How to Get Insurance to Pay for Roof Decking

Getting insurance to cover the cost of replacing roof decking requires careful documentation and a proactive approach. Here are the steps to increase your chances of getting a payout.

1. Document the Damage

As soon as you notice any damage to your roof, it’s essential to document everything. Take clear photographs of the affected areas, including:

  • Sagging or soft spots on the roof
  • Missing or damaged shingles
  • Water damage or leaks inside the house
  • Signs of rot or mold on the decking

Detailed documentation will help when filing your insurance claim and will serve as evidence to support your case.

2. Contact Your Insurance Company Immediately

Don’t wait to contact your insurance company if you suspect damage to your roof decking. The longer you wait, the more likely the insurance company may argue that the damage was due to neglect or poor maintenance. When you file your claim, be sure to mention any specific perils (such as storms or falling debris) that may have caused the damage.

Be prepared to provide:

  • Your policy number
  • A detailed description of the damage
  • Photos and videos of the damage
  • Any receipts for temporary repairs (such as tarping the roof)

3. Schedule an Inspection with a Roofing Contractor

While waiting for the insurance adjuster, it’s a good idea to have a licensed roofing contractor inspect your roof and provide an estimate for the repairs, including roof decking replacement cost. This will give you a better idea of what the repairs will entail and how much they might cost.

A professional roofer can also provide insights into the condition of the roof decking, which is often not visible from the outside. If your roofing contractor finds hidden damage to the decking, you’ll need this information to present to your insurance company.

4. Meet with the Insurance Adjuster

The next step is to meet with your insurance claims adjuster. The adjuster will assess the damage and determine how much the insurance company will pay for the repairs. Make sure to:

  • Be present during the inspection.
  • Point out all areas of damage, including any hidden issues like soft spots or water damage that could indicate decking problems.
  • Provide the adjuster with the roofing contractor’s estimate.

If the adjuster doesn’t acknowledge the need for decking replacement, don’t hesitate to push back and request further evaluation.

5. Understand Your Policy’s Fine Print

Many homeowners mistakenly believe their insurance covers all aspects of roof repairs. However, roof decking may not be covered if your policy includes exclusions for certain materials or age limits on roofs. Review your policy carefully to ensure you understand what is covered and what’s excluded.

You may also consider working with a public adjuster who can advocate on your behalf if you feel your claim is being unfairly denied or underpaid. Public adjusters are familiar with insurance policies and can help you negotiate a better settlement.

Public Adjuster Orlando FL can assist you in maximizing your insurance payout for roof decking and other roof-related claims.

Roof Decking Replacement Cost

The cost of replacing roof decking can vary based on several factors, including the size of your roof, the materials used, and the extent of the damage. On average, roof decking replacement can cost anywhere from $3 to $8 per square foot. This means that for a typical roof, the cost can range from $1,000 to $3,000 or more, depending on the size of the project.

Factors That Influence the Cost:

  • Material Type: Plywood tends to be more expensive than OSB, but it’s also more durable.
  • Extent of Damage: If only part of the decking needs replacing, the cost will be lower than a full replacement.
  • Labor Costs: Roofing contractors charge based on the complexity of the project and local labor rates.
  • Roof Size and Pitch: Larger or steeper roofs are more expensive to repair.

By understanding the roof decking replacement cost, you can better estimate how much your insurance will cover and what you might have to pay out of pocket.

Common Reasons Insurance Might Deny Roof Decking Claims

Even with proper documentation and following the correct steps, there are still reasons why your insurance company might deny your claim for roof decking. Understanding these reasons can help you avoid common pitfalls.

1. Pre-Existing Damage

If the insurance company determines that the roof decking damage existed before the covered peril (such as a storm), they may deny the claim. Regular roof inspections and maintenance can help prevent this issue.

2. Poor Maintenance

Insurance companies expect homeowners to maintain their roofs. If the damage is due to neglect, your claim might be denied. Be sure to keep records of any roof maintenance or inspections to show that you’ve properly cared for your roof.

3. Roof Age

Some insurance companies may refuse to cover roofs that are beyond a certain age, typically 15 to 20 years. If your roof is older than this, check your policy to see if roof repairs or replacement are covered.

Conclusion: Be Proactive to Get Roof Decking Covered by Insurance

Getting your roof decking covered by insurance isn’t always straightforward, but with the right approach, it’s possible to secure coverage for necessary repairs. The key is to document damage thoroughly, act quickly, and work closely with your insurance company and roofing contractor to make sure no detail is overlooked.

If you run into issues with your claim or need help negotiating a fair settlement, consider working with a public adjuster who can advocate on your behalf. For more information on managing roof-related claims, visit Roof Insurance Claims or find an Insurance Claims Adjuster Near Me.

By staying proactive and understanding your policy, you can protect your home and ensure your roof decking is properly repaired.

As Hurricane Francine 2024 approaches, homeowners in Florida and the surrounding areas are preparing for the potential devastation this storm could bring. With strong winds, heavy rainfall, and the likelihood of flooding, protecting your home is essential to minimize damage and ensure your family’s safety. Understanding how to fortify your property before, during, and after a hurricane is crucial for weathering the storm and managing the aftermath.

This guide provides essential tips to help you protect your home from Hurricane Francine and navigate the available resources in the event of property damage.

Preparing for Hurricane Francine 2024: What You Need to Know

Before Hurricane Francine 2024 makes landfall, it’s important to stay updated with the latest information from reliable sources. Here’s how to stay informed and prepare your home ahead of time.

Staying Updated with Hurricane Francine Updates

Tracking the storm’s progress is critical to ensure you have enough time to prepare and evacuate if necessary. Use trusted resources for up-to-date information, including:

  • National Hurricane Center (NHC): Provides forecasts, warnings, and updates about the storm’s intensity and expected landfall.
  • Local News Channels: Offer real-time information about evacuation routes, shelter locations, and weather warnings specific to your region.

Follow any Hurricane Francine updates closely and make decisions early, especially if you live in an evacuation zone.

Essential Steps to Protect Your Home from Hurricane Francine

Proper preparation can mean the difference between minimal damage and extensive repairs. Here are actionable steps to safeguard your property against Hurricane Francine 2024:

1. Secure Windows and Doors

One of the most vulnerable parts of your home during a hurricane is your windows and doors. High winds can shatter glass, leaving your home exposed to further damage. Here’s how to secure them:

  • Install hurricane shutters: These provide extra protection against flying debris.
  • Use plywood: If you don’t have hurricane shutters, boarding up windows with plywood can offer protection.
  • Reinforce garage doors: Make sure your garage doors are braced to withstand strong winds. Consider installing a hurricane-resistant door if you live in a high-risk area.

2. Fortify Your Roof

Your roof is one of the most critical areas to protect during a hurricane. To minimize the risk of roof damage, take the following precautions:

  • Inspect your roof: Check for any loose or damaged shingles and have them repaired before the storm hits.
  • Seal leaks: Look for any potential leaks or weak spots and seal them properly to prevent water damage.
  • Install roof straps: Hurricane straps help anchor your roof to the structure of your home, reducing the risk of it being blown off in high winds.

For homeowners who experience roof damage, filing a hurricane damage claim will be necessary to cover repair costs. You can learn more about this process at Hurricane Damage Claims.

3. Trim Trees and Secure Loose Items

Debris from falling trees and unsecured outdoor items can cause significant damage during a hurricane. To prevent this:

  • Trim overhanging branches: Cut back trees and large branches that could fall on your home or vehicles.
  • Secure outdoor furniture: Bring patio furniture, grills, and other outdoor items inside or secure them to prevent them from becoming projectiles.
  • Clear gutters and drains: Ensure that your gutters and drains are clear of debris to avoid water buildup and flooding around your home.

Creating a Hurricane Emergency Kit

Having a well-stocked emergency kit is crucial for your family’s safety during Hurricane Francine. Your kit should include:

  • Non-perishable food and water: At least a three-day supply per person.
  • Flashlights and extra batteries: Power outages are common during hurricanes.
  • First aid kit: Include bandages, antiseptics, and any necessary medications.
  • Important documents: Store important papers like insurance policies, IDs, and medical records in a waterproof container.
  • Portable phone charger: A fully charged backup charger can keep you connected during power outages.

What to Do During Hurricane Francine

Once Hurricane Francine 2024 begins impacting your area, safety becomes the top priority. Follow these tips to protect yourself and your property during the storm:

1. Shelter in Place or Evacuate

If authorities have issued an evacuation order, follow their guidance immediately. If it’s safe to stay home, shelter in place by:

  • Moving to an interior room away from windows and doors.
  • Keeping emergency supplies within reach.
  • Staying tuned to local news for any emergency updates.

2. Monitor Wind and Water Damage

During the storm, monitor for any signs of damage, such as water intrusion or structural issues. If water starts leaking through your roof or walls, use buckets or towels to contain the damage as much as possible. Remember that safety comes first—do not attempt to go outside until the storm has completely passed.

For homeowners affected by high winds, understanding how to file a wind damage claim can be beneficial. Learn more at Wind Damage Claims.

Hurricane Francine Emergency Resources

In the aftermath of a major hurricane like Hurricane Francine, various emergency resources are available to help homeowners get back on their feet. These resources can assist with immediate relief efforts and long-term recovery.

1. FEMA Assistance

The Federal Emergency Management Agency (FEMA) provides financial assistance and other resources to residents affected by natural disasters. This can include temporary housing, repairs, and disaster unemployment assistance.

2. Red Cross Emergency Relief

The American Red Cross sets up shelters and provides essential supplies like food, water, and medical care to those displaced by hurricanes. Check local resources to find the nearest Red Cross shelter.

3. Local Government Aid

Local governments often provide debris removal, sandbags, and other forms of assistance during hurricane recovery efforts. Stay tuned to local news and emergency services for information on hurricane Francine emergency resources available in your area.

Filing Insurance Claims After Hurricane Francine

Once the storm has passed and it’s safe to assess the damage, homeowners will need to begin the process of filing insurance claims. Here’s a step-by-step guide:

1. Document the Damage

Before making any repairs, document the damage thoroughly by taking photos and videos. This evidence will be crucial when filing your claim.

2. Contact Your Insurance Company

Reach out to your insurance provider as soon as possible to report the damage. Be prepared to provide details about the damage and share the photos and videos you took.

3. Work with an Adjuster

Your insurance company will send an adjuster to assess the damage and determine how much they will cover. To ensure you receive a fair settlement, you may want to work with a property claims adjuster who can represent your interests.

Find more information on working with a claims adjuster at Property Claims Adjuster.

Avoiding Common Pitfalls When Filing Claims

Filing insurance claims after a hurricane can be overwhelming, but avoiding these common mistakes can help ensure you receive the compensation you need:

  • Not documenting all damage: Even minor issues like small leaks or cracks should be documented, as they can lead to more significant problems later.
  • Delaying the claim process: The sooner you file, the faster you can receive the necessary funds for repairs.
  • Not reviewing your policy: Make sure you understand your coverage and what is included under hurricane-related claims.

Conclusion: Be Proactive and Prepared

Hurricane Francine 2024 presents a significant risk to homeowners, but with the right preparation, you can minimize the damage and protect your property. By securing your home, gathering emergency supplies, and staying informed, you can ensure the safety of your family and your home during the storm.

Once the storm passes, take immediate steps to assess the damage and file your insurance claim. Working with a property claims adjuster or public insurance adjuster can help ensure you receive fair compensation for your losses.

For more information on hurricane claims and recovery, visit Hurricane Damage Claims. Be prepared, stay safe, and protect your home from Hurricane Francine’s impact!

A roof inspection for insurance is an essential step for homeowners filing an insurance claim after roof damage. Whether it’s due to storms, aging, or wear and tear, understanding how to prepare for this inspection can increase the chances of a favorable outcome. In this guide, we’ll walk you through the necessary steps to get ready for a roof inspection, what to expect from the insurance roof inspection, and how to ensure you have all the information needed for your roof inspection report for insurance.

Why Is a Roof Inspection Important for Insurance Claims?

Insurance companies require a roof inspection to assess the extent of the damage and determine whether it qualifies for coverage. During the insurance adjuster roof inspection, a representative from the insurance company will thoroughly inspect your roof, documenting any issues and comparing them against your insurance policy. Proper preparation can make the process smoother and prevent unnecessary delays in your claim approval.

Steps to Prepare for a Roof Inspection for Insurance Claims

1. Review Your Insurance Policy

Before the inspection, it’s essential to know what your insurance policy covers. Some policies have limitations on roof damage claims, such as excluding certain types of damage or covering only partial repairs. Review the terms regarding roof coverage to avoid surprises during the claims process.

  • Tip: Look for specific clauses that cover storm damage, roof wear, or age-related issues.

2. Schedule a Preliminary Roof Inspection

Before the official insurance roof inspection, it’s beneficial to hire a professional roofing contractor to perform a preliminary inspection. This step can help identify potential issues that could affect your claim and ensure you’re well-prepared when the insurance adjuster roof inspection takes place.

Consider hiring an experienced contractor who specializes in roof damage assessments. They can provide you with a detailed report that will be valuable during the claims process. You can Hire the Best Roof Contractors to ensure your roof is thoroughly inspected before your insurance company’s visit.

3. Document the Roof’s Condition

Proper documentation can be a game-changer when filing an insurance claim. Take detailed photos and videos of your roof before the inspection to provide a clear record of its condition. Ensure you cover all areas, including close-ups of visible damage such as missing shingles, cracks, or leaks. This visual evidence will help build a stronger case during the roof inspection for insurance claim.

Checklist for documentation:

  • Take photos of all roof sections, including any damage.
  • Capture images of gutters, skylights, and chimneys.
  • Record a video for an overall view of the roof.

4. Keep Receipts and Maintenance Records

It’s essential to gather any receipts or maintenance records you may have related to your roof. Insurance companies want to see that you’ve been properly maintaining your roof over time. Providing a roof inspection report for insurance from past professional inspections or recent repairs can demonstrate that your roof issues weren’t due to negligence.

5. Clean the Roof and Gutters

Before the insurance adjuster arrives, ensure your roof is clean and free of debris. A dirty or cluttered roof can hide damages or create the impression that your roof has been neglected. Clean the gutters and remove any tree branches, leaves, or other materials that may have accumulated. A clean roof helps the adjuster focus solely on the areas needing repair.

6. Prepare for the Insurance Adjuster’s Visit

When the day of the insurance adjuster roof inspection arrives, it’s important to be ready. The insurance adjuster will likely need access to your attic, roof, and other parts of your home. Make sure to be present during the inspection, so you can guide them to any specific areas of concern.

  • Actionable Insight: Be polite but proactive—point out visible damage and provide any documentation you’ve prepared. Don’t be afraid to ask questions during the inspection for clarification on how the process will proceed.

7. Consider a Public Adjuster

Sometimes, it can be beneficial to hire a public adjuster to help you navigate the roof inspection and claims process. A public adjuster represents your interests and can provide a more thorough evaluation of the roof damage compared to the insurance company’s adjuster. Their job is to ensure you get the maximum payout from your claim.

8. Get a Second Opinion

If you’re not satisfied with the results of the insurance roof inspection, you can request a second opinion from another contractor or adjuster. This can be particularly useful if you feel that the damage has been underestimated or overlooked. A second opinion might also reveal additional issues that weren’t covered in the initial roof inspection report for insurance.

What to Expect During the Roof Inspection

Understanding what the insurance adjuster will look for can help you prepare adequately. Here are a few key elements they’ll assess during the roof inspection for insurance:

  • Age of the roof: Older roofs may not be covered for full replacement.
  • Visible damage: This includes missing shingles, cracks, leaks, or soft spots on the roof.
  • Wear and tear: The adjuster will differentiate between normal wear and damage caused by storms or other events.
  • Gutters and flashing: These areas will also be inspected for signs of damage or improper installation.

Common Causes of Roof Damage

  • Storm Damage: High winds, hail, and falling debris can cause significant roof damage.
  • Water Damage: Leaks and poor drainage systems can lead to mold growth and structural problems.
  • Age-Related Damage: Older roofs are more prone to cracking, sagging, and overall wear.

Post-Inspection: Next Steps

After the insurance adjuster roof inspection, you’ll receive a detailed report from the insurance company outlining their findings. This report is crucial, as it will determine the amount of coverage you’ll receive for repairs or replacement. Here’s what to do next:

  • Review the report thoroughly and compare it with your documentation.
  • If you notice discrepancies or missing information, contact the insurance company to address them.
  • Get estimates from roofing contractors for the repairs or replacements needed based on the report.

By following these steps, you’ll ensure you are well-prepared for the roof inspection for insurance claim and maximize your chances of receiving the coverage you need.

Final Thoughts

Preparing for a roof inspection for insurance can be a daunting process, but with the right preparation, you can navigate it smoothly and increase the likelihood of a successful claim. Start by reviewing your insurance policy, hire a roofing contractor for a preliminary inspection, and document everything thoroughly.

For homeowners seeking professional advice or assistance during this process, consider reaching out to 411 Claims Help for guidance on filing claims and Hiring the Best Roof Contractors. These resources can help streamline the process and ensure you get the compensation you’re entitled to.

By being proactive and informed, you can protect your home and ensure that any necessary roof repairs are covered by your insurance.

Fire damage can be one of the most devastating events a homeowner might experience. Not only does fire consume possessions and damage the structure of your home, but it also leaves behind smoke and soot that can further deteriorate the property. If you’re facing such a crisis, fire damage restoration becomes crucial to returning your home to its original condition. This guide will help you understand what to expect during the process and why hiring the right professionals is essential.

Understanding Fire Damage Restoration

Fire damage restoration is a process that involves cleaning up, repairing, and restoring a property that has been affected by fire. The goal is to mitigate any further damage, remove smoke and soot, and restore your home to a livable condition as quickly as possible.

The Importance of Immediate Action

Time is of the essence when dealing with fire damage. The longer you wait, the more damage can set in. Here’s what happens if you delay:

  • Smoke and soot can cause further discoloration to walls, ceilings, and other surfaces.
  • Odors from smoke will seep deeper into fabrics, carpets, and upholstery.
  • Water damage may occur from firefighting efforts, leading to mold growth.

Hiring a fire damage restoration service immediately after the fire is crucial to preventing long-term damage and extensive repairs.

Step-by-Step Fire Damage Restoration Process

The fire damage restoration process typically includes the following steps:

1. Assessment and Inspection

The first step in fire restoration is a thorough inspection and damage assessment. Restoration professionals will evaluate the structural integrity of the home, identify the extent of fire, smoke, and water damage, and develop a restoration plan.

During this stage, professionals will often collaborate with public adjuster services to ensure you receive a fair insurance payout for the damages. Public adjuster services can be invaluable during this process as they work directly with your insurance company, advocating on your behalf.

2. Securing the Property

Once the assessment is completed, the next step is securing the property to prevent further damage. This could include boarding up windows, covering exposed areas, or even placing a temporary roof tarp to protect against weather elements.

3. Water Removal and Drying

Firefighting efforts usually involve water, leading to water damage. Water extraction is essential to prevent mold growth and further structural damage. Restoration experts will use dehumidifiers and specialized equipment to dry out your home.

4. Smoke and Soot Removal

Smoke and soot can cause permanent damage if not addressed quickly. Restoration companies use specialized cleaning agents and techniques to remove soot from surfaces and prevent further damage. Additionally, air scrubbers and industrial fans are employed to remove smoke particles and eliminate lingering odors.

5. Cleaning and Sanitizing

After removing smoke and soot, the next step is a deep clean of all affected surfaces. This can include:

  • Deodorizing to eliminate persistent odors.
  • Cleaning of personal belongings, such as furniture, clothing, and other possessions.
  • Sanitization of surfaces to ensure they are safe for occupants.

6. Restoration and Repair

The final step is restoring the property to its original condition. This could involve:

  • Replacing damaged drywall, flooring, and ceilings.
  • Repainting walls and refinishing surfaces.
  • Rebuilding parts of the home that were severely damaged.

Hiring a fire restoration damage expert ensures the work is done correctly and efficiently, giving you peace of mind as your home is brought back to life.

What to Look for in a Fire Damage Restoration Company

Choosing the right fire damage restoration service is crucial to a successful recovery. Here are some key factors to consider when hiring a restoration company:

  • Experience: Look for companies with experience in fire restoration, as it requires specialized skills and knowledge.
  • Certifications: Ensure the company has proper certifications, such as from the Institute of Inspection Cleaning and Restoration Certification (IICRC).
  • Quick Response Time: A reputable company will offer 24/7 emergency services and be able to respond immediately after the fire.
  • Comprehensive Services: The best companies will handle every aspect of the restoration process, from initial inspection to the final repair.

In addition, it may be beneficial to consult with property damage services for professional advice on ensuring your home is fully restored.

Fire Damage Restoration Costs: What to Expect

The cost of fire damage restoration depends on several factors, including the extent of the damage, the size of the property, and the type of materials affected. On average, homeowners can expect to pay anywhere between $3,000 and $30,000 for fire restoration services.

  • Water damage restoration from firefighting efforts can add additional costs, particularly if mold remediation is necessary.
  • Soot and smoke removal will vary based on the number of affected rooms.
  • Structural repairs can be the most expensive aspect, depending on how much of the home needs rebuilding.

Always request a detailed estimate from your restoration company before work begins and consult your insurance provider to understand what is covered under your policy.

How to File an Insurance Claim After a Fire

Dealing with insurance claims can be one of the most stressful parts of fire damage. However, understanding the process can ease the burden. Follow these steps to file a claim:

  1. Contact your insurance company immediately to report the fire.
  2. Document the damage by taking photos or videos of the affected areas.
  3. Keep receipts and records of any temporary repairs or living expenses if you need to relocate.
  4. Consult with public adjusters if you’re unsure how to proceed. They can negotiate with your insurance company to maximize your payout.

Many homeowners find it beneficial to hire a public adjuster service to manage the complexities of the claim, ensuring you receive the compensation you deserve.

Conclusion: Take Action Quickly

Fire damage can be overwhelming, but with the right fire damage restoration service, you can rebuild your home and get back on track. Time is critical, so contacting professionals as soon as the fire is extinguished will minimize long-term damage and help you return to normal life sooner.

For those in need of comprehensive restoration, connecting with experts through property damage services ensures that every aspect of your home’s recovery is handled with care.

Make sure to protect your home, and if you ever face fire damage, don’t hesitate to seek immediate assistance from trained professionals.

When storm damage strikes, homeowners face the critical question: do I contact insurance first or contact a roofing company? This decision can significantly impact how quickly repairs are completed and whether the insurance claim process goes smoothly. Understanding the proper sequence of steps can save you time, stress, and money.

The Impact of Storm Damage on Your Roof

Storms can wreak havoc on your home, particularly the roof, which is your first line of defense against the elements. Wind, hail, and heavy rain can cause severe damage that requires immediate attention. But after a storm hits, your next move is crucial. Should you reach out to your insurer or a roofing company first?

Contacting Insurance First: Benefits and Drawbacks

Why You Should Contact Insurance First

Most insurance policies require homeowners to report damage as soon as possible after it occurs. Contacting your insurer first allows you to file a claim quickly, ensuring that your coverage kicks in for the necessary repairs. Some of the key benefits of contacting your insurance first include:

  • Faster claim approval: By notifying your insurance provider promptly, you initiate the claim process immediately, which can reduce delays in getting your roof repaired.
  • Accurate damage assessment: Your insurance adjuster will assess the full extent of the storm damage, including areas that might not be visible to you or a roofer at first glance.
  • Claim eligibility: Failure to notify your insurance provider in a timely manner could result in your claim being denied, leaving you to cover the repairs out of pocket.

Drawbacks of Contacting Insurance First

However, contacting your insurance first comes with some drawbacks. For one, the insurance adjuster assigned to your claim works for the insurer, which may not always align with your best interests. The adjuster might undervalue the damage or recommend minimal repairs. This is where public adjuster services can be beneficial. Public adjusters work on behalf of homeowners, ensuring a fair assessment and maximizing the compensation you receive for repairs. Learn more about how public adjusters can help at 411 Claims Help.

Contacting a Roofing Company First: When It Makes Sense

The Case for Calling a Roofer First

On the other hand, contacting a roofing company first can also be advantageous, especially if the damage is extensive and immediate repairs are necessary to prevent further harm. Here’s why:

  • Quick response and emergency repairs: A roofer can assess the situation quickly and offer immediate solutions to mitigate further damage. For instance, if the storm has left a gaping hole in your roof, you’ll need temporary fixes like tarping before an insurance adjuster arrives.
  • Expert assessment of repair needs: While insurance adjusters are trained to evaluate damage, roofers are specialists in understanding the specifics of roof damage. They can provide a more detailed inspection and offer advice on the best long-term repairs.

Drawbacks of Contacting a Roofing Company First

While there are clear benefits, calling a roofer before your insurer can lead to some complications. For example:

  • Risk of out-of-pocket expenses: If you begin repairs before filing a claim, the insurance company might not cover all the costs, especially if they believe the damage wasn’t as severe as initially claimed.
  • Potential for claim rejection: Insurance companies prefer to conduct their assessments before any work is done. If a roofer performs substantial repairs before an insurance inspection, you might find yourself in a dispute over coverage.

The Best Approach: Combining Both Steps

So, do I contact insurance first or contact a roofing company? The ideal approach is to contact both in a strategic order:

  1. Notify your insurer: Let them know about the storm damage as soon as possible. This step ensures that you are in compliance with your policy terms.
  2. Schedule an inspection with a roofer: Once you’ve reported the claim, contact a trusted roofing company for an inspection. Many roofing companies offer free inspections, which can help you understand the extent of the damage before the insurance adjuster arrives.
  3. Consider hiring a public adjuster: If the damage is significant or if you suspect your insurer may undervalue the claim, consider hiring a public adjuster. Public adjusters work for you, not the insurance company, to ensure you receive the compensation needed to fully restore your roof. For professional assistance, you can explore public adjuster services.

Working with Your Insurance and Roofing Company: Tips for Success

Here are some tips for working effectively with both your insurance provider and your roofing contractor:

  • Document everything: Take photos and videos of the storm damage to your roof and surrounding property. This documentation will be invaluable when filing your claim and during the insurance adjuster’s inspection.
  • Get multiple quotes: After the adjuster assesses the damage, obtain estimates from multiple roofing companies. This ensures you receive a fair price for the repairs and allows you to make an informed decision.
  • Stay involved in the process: Whether you’re dealing with an insurance adjuster or a roofing contractor, staying informed and asking questions will help ensure that the process runs smoothly. Don’t be afraid to ask for clarification on repairs, costs, or what’s covered by your insurance policy.
  • Be cautious of storm chasers: Unfortunately, some unscrupulous roofing companies, known as “storm chasers,” take advantage of homeowners after severe weather events. Be wary of any contractors who show up uninvited and press you to sign contracts immediately.

Why Public Adjusters Can Be Key

If your storm damage is extensive and you’re unsure whether your insurer will provide full coverage, a public adjuster can be an invaluable asset. These professionals offer:

  • Independent assessments: Public adjusters provide an unbiased evaluation of your roof’s damage, ensuring that your insurance claim reflects the true cost of repairs.
  • Maximized claims: Because public adjusters work for you, they focus on maximizing the payout, covering not only immediate repairs but also hidden or long-term issues caused by storm damage.

To learn more about how public adjusters can assist you in getting the best claim settlement, visit 411 Claims Help.

Conclusion: What Should You Do First After Storm Damage?

When faced with the question, do I contact insurance first or contact a roofing company, the best course of action is a balanced approach. Start by notifying your insurer to meet your policy’s requirements, then schedule an inspection with a reputable roofing company to get a detailed damage assessment. Finally, consider hiring a public adjuster if you want to ensure a fair settlement from your insurer. By following these steps, you can streamline the repair process, protect your home, and avoid common pitfalls during the claims process.